Bluebird Capsule Swap Tutorial
This tutorial will demonstrate how to swap the capsule in the Blue Bluebird condenser microphone.
The stock capsule is nice, but the mic's sound is too bright for some sources. If you're looking to turn the mic into an all-purpose studio workhorse, swapping the edge-terminated capsule for a more balanced capsule like the RK-47 will give you what you need.
Important note on technique: these photos suggest removing all the wires from the capsule during disassembly. If you plan to reuse the capsule in a future mod, we recommend instead desoldering these wires from the PCB, and leaving the top ends attached to the capsule.
These photos were contributed by Robert Richards. Thanks, Robert!
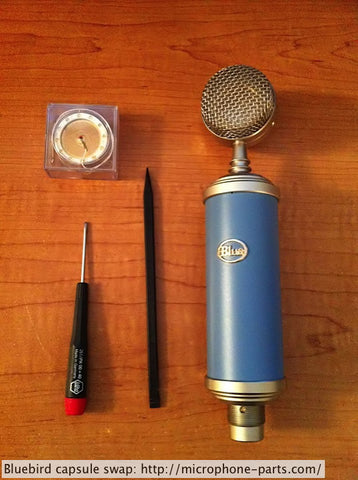
Lay out your tools, and organize a clean and well-lighted workspace. You'll need a screwdriver and a probe. You might also appreciate having a pair of needle-nose pliers to pull out the fine wire mesh from the headbasket, and a pair of thin neoprene painter's gloves to wear while handling the capsules.
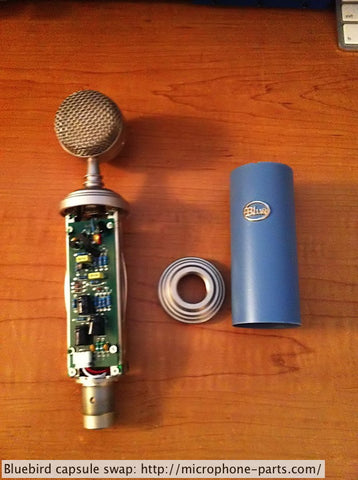
Remove the mic's body by spinning off the large nut at the bottom, then sliding the body sleeve away.
Make a note of where the two wires from the capsule are soldered to the PCB. These are the locations where the new capsule wires will be installed. We recommend photographing these locations for reference, then desoldering them so the capsule wires can be pulled free from above.

Remove the screws holding the two halves of the headbasket together. Be careful not to touch the diaphragms on the capsule. You might wish to use this capsule (which is a nice design) in some future mod.
This photo shows the rear diaphragm of the capsule; it is not coated with gold.

Carefully pry the capsule forward to expose the two screws holding it to the rubber harness. Remove those screws to avoid the risk of ripping the harness.
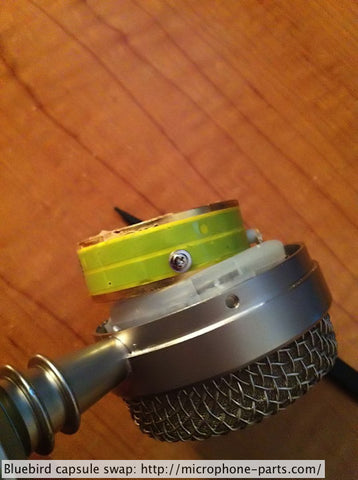
After removing the screws pull the capsule gently out of the harness. (In this photo, we missed one of the two screws that should have been removed.)
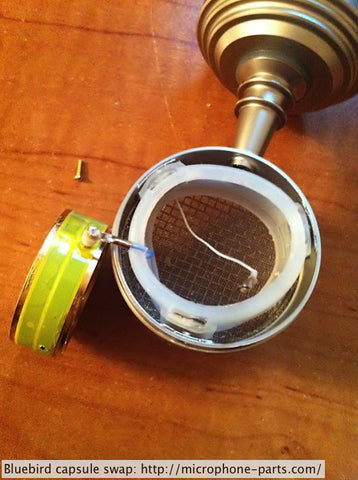
These photos suggest removal of the wires from the capsule. This is a valid way to proceed, although if you intend to repurpose this capsule, we recommend instead desoldering the other end of each wire from the PCB.

Using the probe, carefully separate the inner wire mesh layer from the headbasket. This step is optional, but will help reduce reflections that can color the sound of the microphone.

A pair of needle-nose pliers (not pictured) can be useful in pulling the mesh out of the basket.

Strip the inner screen from the domed half of the headbasket, too. Be sure to trim away any leftover bits of wire mesh from around the edges.
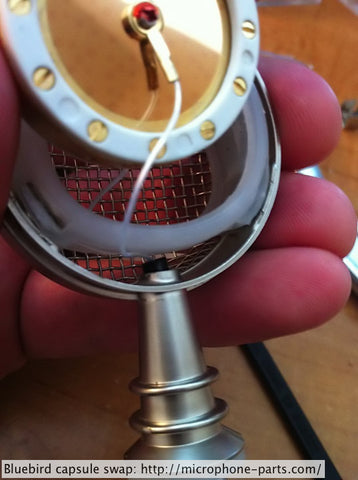
Holding the replacement capsule in place, route its termination wires through the neck of the Bluebird's headbasket. Note that at no point should any wires be unscrewed from the RK-47 capsule.
Mark one of the wires, so you can tell which wire corresponds to the domed side of the headbasket.

Assuming you're swapping in an RK-47, route the separate blue termination wire too.

Attach the blue termination wire to one of the predrilled holes on the edge of the RK-47 backplate. We include screws for this, but because they are designed to simultaneously mount the capsule to a saddle, they are too long to be used without a saddle. Simply clip the screw to a thread length of approximately 2mm with a pair of wire cutters, then thread it through the terminal of the blue wire and screw it into the capsule. It is not necessary to overtighten the screw.

Carefully insert the new capsule into the rubber harness, taking care not to touch the diaphragms.
Because the RK-47 is a dual-diaphragm capsule, either side can be "front." We recommend wiring the side of the capsule facing the domed half of the headbasket as the "front," as this grille shape is less likely to cause standing waves.
(Alternatively, you can wire both diaphragms together onto the PCB to convert the mic to an Omnidirectional.)

Reassemble the headbasket.

Assuming you will be setting up the mic for Cardioid operation, find the white diaphragm wire that goes to the "rear" side of the capsule. Cover it with black electrical tape, and tuck it out of the way at the top of the PCB.
(If the front diaphragm ever becomes contaminated, you can simply solder this wire to the PCB, spin the mic around, and be back in business immediately.)
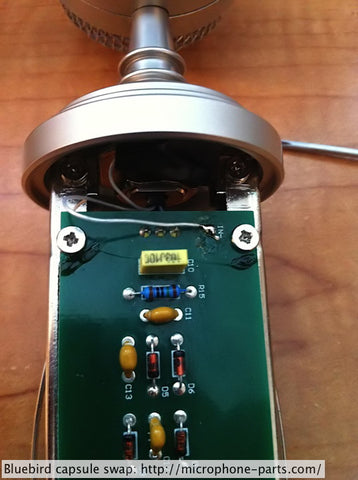
Solder the capsule's "front" diaphragm wire as indicated -- but refer to your own photos, in case your Bluebird's PCB layout differs from ours.
Solder the blue (backplate) termination wire as indicated.

Inspect the PCB carefully for loose wires, cold solder joints, and other potential problems. Reassemble the microphone. Tip it back and forth gently, listening for any rattles or moving parts. These problems should be addressed before powering up the mic.
Apply phantom power. Gently run a fingernail across the front and rear headbasket to ensure that the capsule orientation is as desired.
Then record a convenient source, e.g. your voice. The playback should reveal a balanced, clear, extremely high-fidelity sound. Enjoy the new mic!

